
NOTE: This applies to machines on research network only. Specifically, it does not apply to machines used for course work.
To connect internal resources such as telnet, ssh, ftp and restricted http resources you need to use something called "ssh tunneling". You require a ssh client in order to use this service. If you require a ssh client you can download putty from www.putty.org. Note you are not required to use this ssh client, any ssh client that supports SSH protocol 2.0 should work fine. Please note my instructions bellow are using a commerical version of ssh. I will be updating my instructions to use putty soon. Until then please refer to putty documentation putty html docs.
Brief overview of ssh tunneling.
To use the ssh tunneling you must first establish a ssh connection to the remote host or gateway using a ssh client. In the above picture you can see our green tunnel which represents the ssh tunnel. From the picture above you see I have one tunnel and three separate services running through my tunnel. The "localhost:xxxx" is how I would connect to services through the ssh tunnel. For example if I wanted to connect to www.sce.careton.ca through my ssh tunnel using a web browser such as Internet Explorer I would type the following URL in my browser "http://localhost:4080". In my instructions below I describe in detail how to achieve what you see in the above diagram for microsoft windows and linux/UNIX.
Below I have examples on how to tunnel common services such as ssh and telnet. You are not restricted to just tunneling these services. Any TCP/IP application can be tunneled through this service including remote desktop for windows, mail(pop/imap), VNC just to name a few.
SSH tunneling setup for Microsoft windows
Step 1.
Assuming you have installed ssh and you have created short cuts on your desktop, simply double click on the ssh icon. Now click Profiles -> Add Profile.
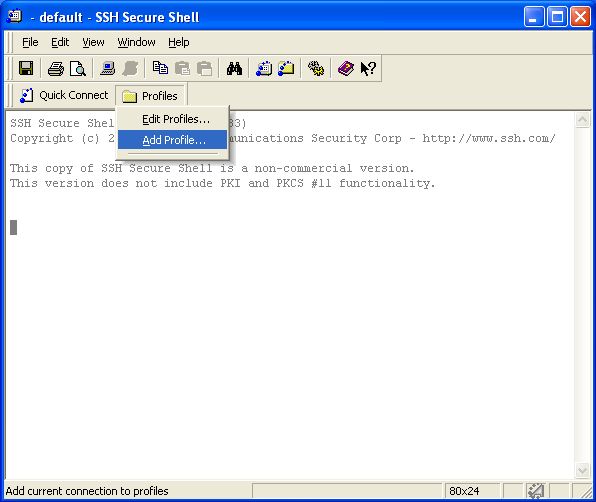
You will be prompted to name your tunnel, in this case I named the profile "SCE tunnel".

Step 2
Now click on Profiles -> Edit Profiles and you see the following.
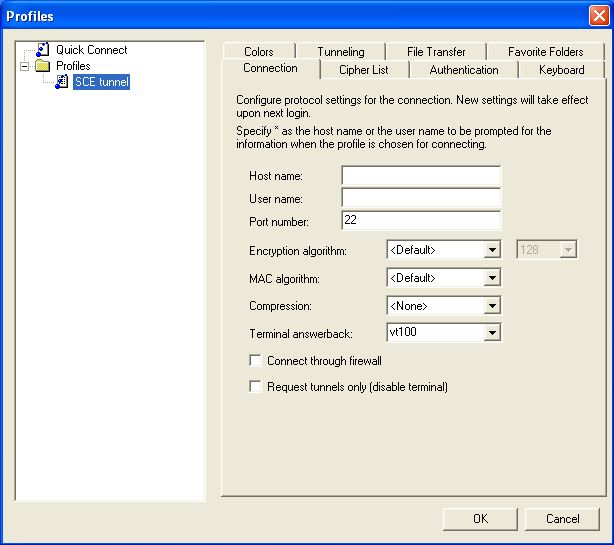
As you see below fill in the two fields "Host name" and "User name". Host name must be "terminus.sce.carleton.ca" and replace "your_sce_username" with your own.
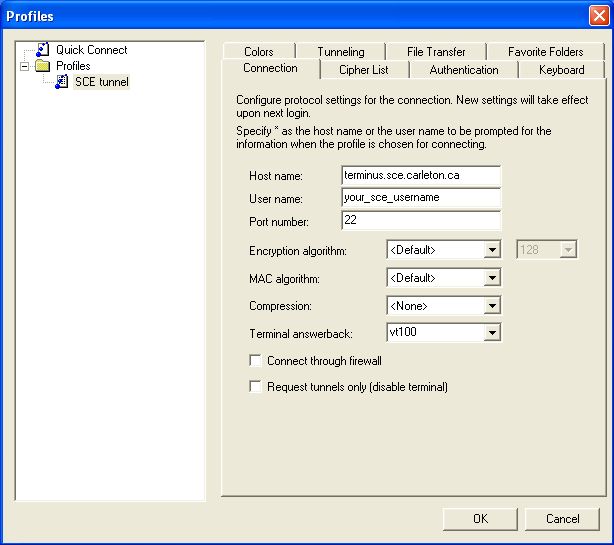
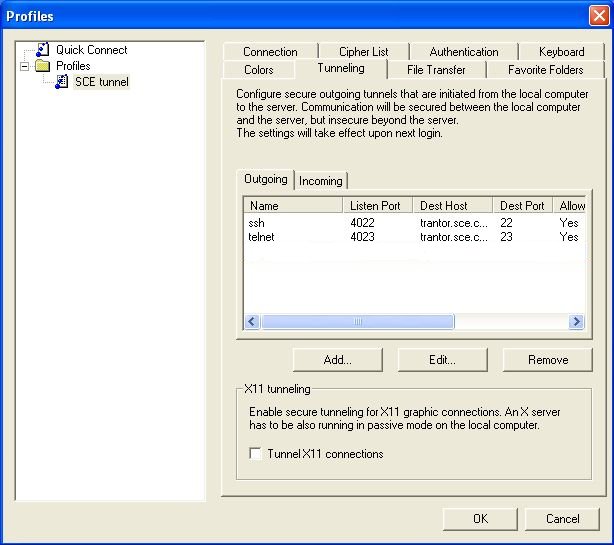
Now once "Connection tab" has been complete, click Ok. Now click on Profiles -> Edit Profiles, and click on "tunneling tab", then click Add. You will get the following dialog box.
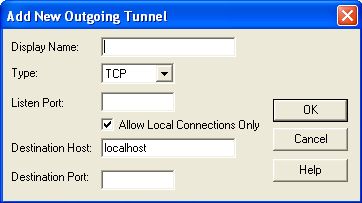
Here are some definitions of the fields you see above.
Display Name Simply a reference for you to understand what service you are connecting to(mail,ssh,http ...etc).
Type Protocol to be used, you will notice there is simply only two choices. TCP and ftp, in most cases TCP will be used.
Listen Port This port is what we will be using to connect to tunneled services. This port can be any port between 1024 to 65535. In my example we will be using ports greater than 4000 less than 5000.
Destination Host This will be the remote server/workstation you are accessing.
Destination Port Remote port of service we are accessing, for example ssh would be port 22, telnet would be port 23.
The first tunnel we will be creating is for ssh. This will allow us to ssh from outside of the university to a internel machine called trantor.sce.carleton.ca. Note you can use trantor, or replace trantor with your work station which you wish to access through ssh.
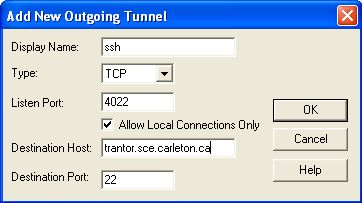
Simply click Ok and you should see the following.
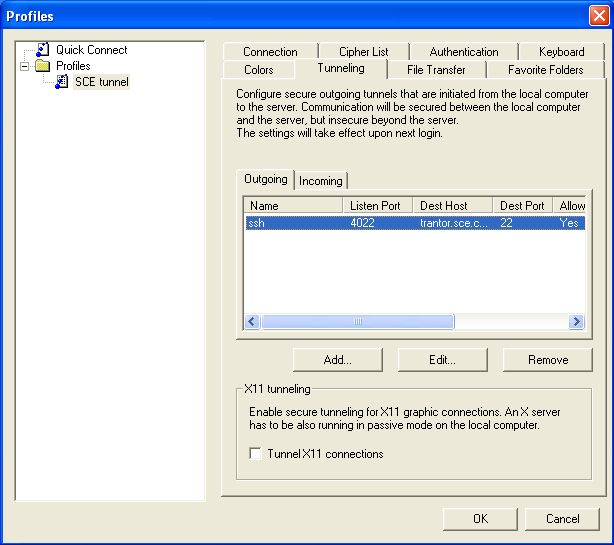
Now we will proceed with setting up telnet services. So lets click Add once again.
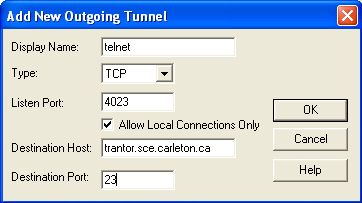
Click Ok and you should see the following.
Simply Click ok and we are already to start launching services through a ssh tunnel.
Step 3 Establishing a ssh tunnel
First we must establish the ssh tunnel. Double click on your ssh icon and click Profiles -> sce tunnel.
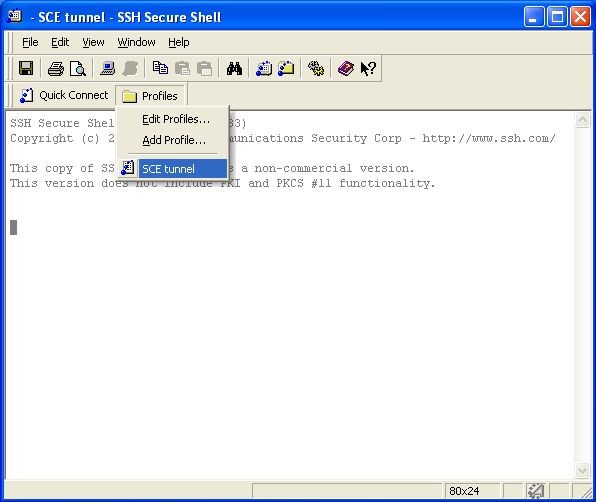

You will be prompted with a Host Identification dialog box. Simply click Yes then enter your sce password when prompted. Now you see something similar to below.

You may minimize the above window, but do not close the above window. This window must be open while connecting to services with in the Systems and Computer Engineering department.
Step 4 Connecting to services through your tunnel
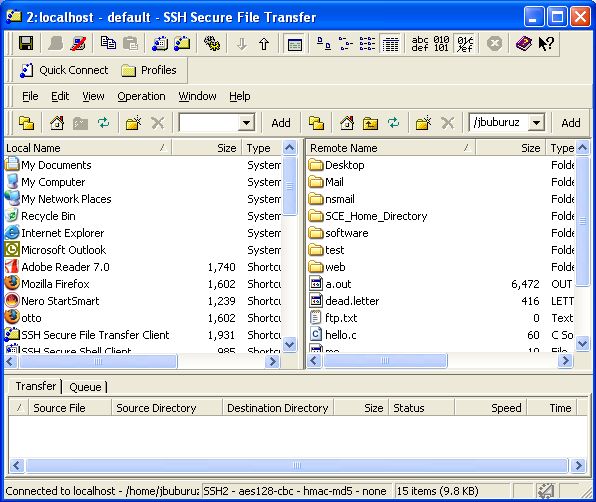
Open a new ssh terminal, double click on icon or click Quick Connect
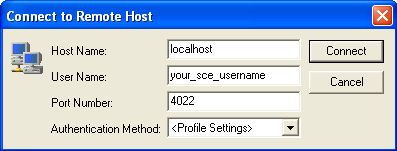
Host name must be "localhost" and port number must match the one we specified earlier. In this example we want to establish a ssh connection with "trantor.sce.carleton.ca". Simply replace "your_sce_username" with your sce username and click connect. You will be prompted with a key exchange, answer Yes and finally prompted for your sce password. You now should have a terminal similar to the image below.
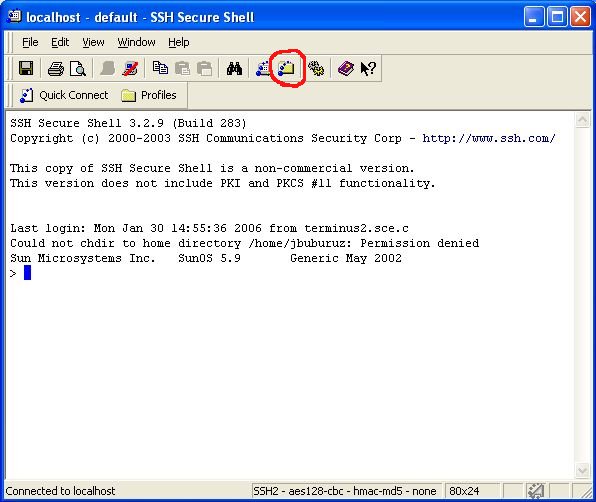
Now above you have a terminal(shell) established to trantor.sce.carleton.ca. You can use this same shell to transfer files through sftp. Simply click on the sftp icon ![]() which I have circled in red in the above picture.
which I have circled in red in the above picture.
The following example will show you how to establish a remote tunnel to trantor.sce.carleton.ca for ssh/sftp and X forward capabilities.
Step 1
Open a terminal and type the following:
mylinuxhomepc:~# ssh -L 4022:trantor.sce.carleton.ca:22 terminus.sce.carleton.ca -l your_sce_username
Here is a break down of the above command.
ssh -L This is required when port forwarding(tunneling).
4022 This is the local port we are creating to access remote host.
trantor.sce.carleton.ca Remote host which we wish to access.
22 Port which we are connecting to on remote host(tunneling server)
terminus.sce.carleton.ca This is the ssh tunneling server.
-l your_sce_username The -l option tells ssh to use your_sce_username when connecting to remote host.
After executing above command you will be prompted for a key exchange and for your password. If you are successful you should see the following:
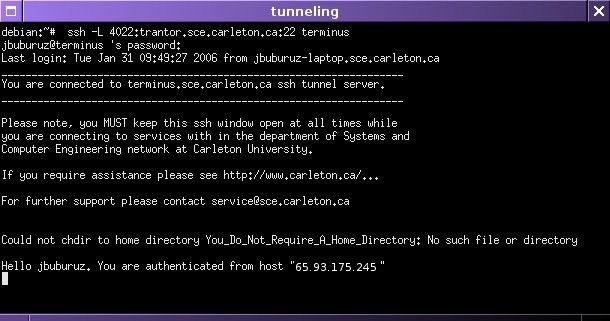
Note the above shell is your tunnel now. DO NOT CLOSE THIS window! Closing this window disconnect you from terminus. Another important note about this tunnel, your shell above will not allow you to interact with terminus. This shell simply displays a message of the day and keeps your tunnel open until you choose to disconnect.
Step 2
Now that we have our tunnel in place we can access trantor.sce.carleton.ca through ssh/sftp/telnet or any other service trantor may be offering. To access trantor through ssh we would do the following. Open another terminal and type the following in:
mylinuxhomepc:~# ssh -p 4022 localhost -l jbuburuz -X
After this you would be prompted possibly for a key exchange and your password. I used the "-X" option to simply show that you can use X forwarding when tunneling.